
















1. Preparation: Building a Solid Foundation
1.1 Safety First
Safety must be established before any roofing work begins. Wear the correct personal protective equipment (PPE), including a hard hat, heavy-duty gloves, non-slip steel-toed shoes, and safety glasses. Ensure your ladder is securely mounted at the correct angle. If the roof has a steep pitch, mandatory fall-protection gear such as safety harnesses and anchored ropes must be used.
1.2 Gathering Tools and Materials
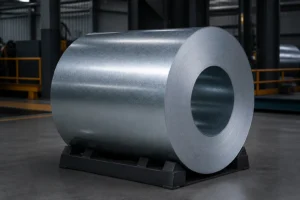
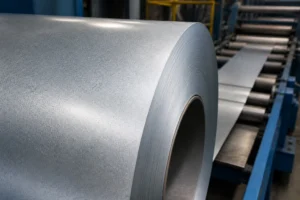
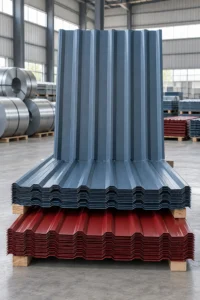
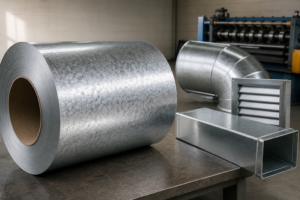
A seamless installation requires the right equipment on hand before you start. You will need measuring tools, a circular saw with a metal-cutting blade, a drill with appropriate hex bits, roofing screws (with neoprene washers), a chalk line, a level, a pry bar, and a hammer. Material-wise, ensure you have all your metal roofing sheets, synthetic underlayment, edge flashing, and required trim. While this guide focuses on metal roofing, alternative materials such as ASA UPVC roof sheets offer excellent corrosion resistance and thermal insulation for projects where those properties are a priority.
1.3 Measuring the Roof
Accurate measurements form the basis of a successful installation. Measure the length and width of each roof section, including all overhangs, to calculate the total square footage. Always order an additional 10% to 15% of material to account for overlap requirements, cutting mistakes, and structural waste.
1.4 Preparing the Roof Surface
Remove any existing roofing materials, such as old shingles or tiles, down to the bare roof deck. Inspect the wooden decking for signs of water damage, rot, or warping, and repair or replace panels as needed. Sweep the deck completely clean and dry. Finally, roll out and staple a high-quality surface underlayment across the deck to provide a moisture barrier between the interior air and the metal roofing sheets.
| Phase | Essential Item / Tool | Primary Function during Installation |
|---|---|---|
| Safety & Prep | Harness, Non-Slip Shoes, Underlayment | Fall prevention and establishing a watertight deck barrier. |
| Measurement | Chalk Line, Level, Measuring Tape | Ensuring perfectly straight rows and accurate material cuts. |
| Cutting & Fitting | Circular Saw (Metal Blade), Pry Bar | Sizing sheets to the roof profile and adjusting stubborn panels. |
| Fastening | Drill, Roofing Screws, Sealant | Securing metal sheets and completely sealing penetration overlaps. |
2. Core Installation Steps
2.1 Install the Eave Trim
Begin by securing the eave trim along the bottom edge of the roofline. This trim acts as an end-effect barrier designed to funnel water away from the fascia board. Attach the eave trim directly to the roof deck using the appropriate roofing nails or screws, spacing the fasteners exactly according to the manufacturer’s specifications.
2.2 Lay the First Row of Metal Sheets
Start at one bottom corner of the roof and align the first metal roofing sheet perfectly square with the eave trim. Use a level and strike a chalk line to ensure the sheet is perfectly straight. Drive your roofing screws through the metal sheet and into the roof deck at the designated fastening points. Ensure the screws are driven straight and snug, but do not overtighten and crush the sealing washers.
2.3 Install the Subsequent Rows
Continue laying out the metal roofing sheets row by row. Follow the manufacturer’s specific instructions for overlap tolerances (side laps and end laps) to ensure water cannot penetrate between the seams. Verify the level and alignment of every single sheet before fastening it to the roof deck, ensuring the rows remain perfectly straight all the way to the peak.
2.4 Install the Ridge Cap
Once all the primary metal roofing sheets are secured, install the ridge cap. This component covers the exact peak of the roof, providing a finished look while preventing wind-driven rain from entering the top seam. Cut the ridge cap to the exact length of the roofline and fasten it securely through the ribs of the underlying metal sheets.
2.5 Install the Flashing
Flashing is critical for waterproofing vulnerable roof penetrations, such as vents, chimneys, and skylights. Cut the flashing down to the required size, fit it tightly around the bases of the penetrations, and overlap it correctly with the adjacent metal sheets. Fasten the flashing securely into place and apply a generous bead of high-grade roofing sealant to guarantee a watertight seal.
3. Final Checks and Site Cleanup
3.1 Inspect the Installation
Once the physical installation is complete, conduct a thorough visual and physical inspection of the entire roof. Check that every metal sheet is tightly secured, all overlaps are perfectly flush, and the flashing is cleanly installed. Look for any loose fasteners, missing screws, or scratched paint, and immediately correct those areas.
3.2 Conduct a Site Cleanup
Thoroughly clean the roof and the surrounding ground. Carefully sweep off all metal shavings (swarf) generated from drilling and cutting, as leaving these on the roof will quickly cause severe rust spots. Dispose of all metal scraps, dropped screws, and packaging. A pristine site not only looks professional but removes serious safety and puncture hazards.